
Last Updated: October 30, 2026
Quick Summary
To clean sterling silver, soak the piece in warm water with a drop of mild soap, brush gently with a soft toothbrush, rinse under cool water, and dry every crevice completely. Gentle methods protect the metal, stones, and finishes, while abrasive polishes and harsh chemicals can cause damage. Always match your tarnish removal method to the piece's construction.
- Soak silver in warm soapy water for a few minutes before brushing gently around settings and edges.
- Skip paper towels, rough sponges, and whitening toothpaste because they scratch silver.
- Use baking soda paste only on plain silver, never on stones, pearls, or oxidized finishes.
- The foil and hot water method reaches crevices but cannot remove dirt, lotion residue, or grime.
- Store pieces dry in airtight containers with anti-tarnish strips to slow tarnish.
Table of Contents
- How to Clean Sterling Silver Jewelry: The Gentle Method That Works
- How to Remove Tarnish From Sterling Silver
- Clean Sterling Silver With Baking Soda (and When Not To)
- What Not to Use to Clean Silver Jewelry
- How to Store Sterling Silver Jewelry to Slow Tarnish
- Shop Sterling Silver Pieces Worth Caring For
- Frequently Asked Questions
How to Clean Sterling Silver Jewelry: The Gentle Method That Works
Learning how to clean sterling silver jewelry starts with one simple truth: gentleness beats force every time. Lovely pieces can be dulled by harsh scrubbing, while a soft cloth and a little patience usually do the job.
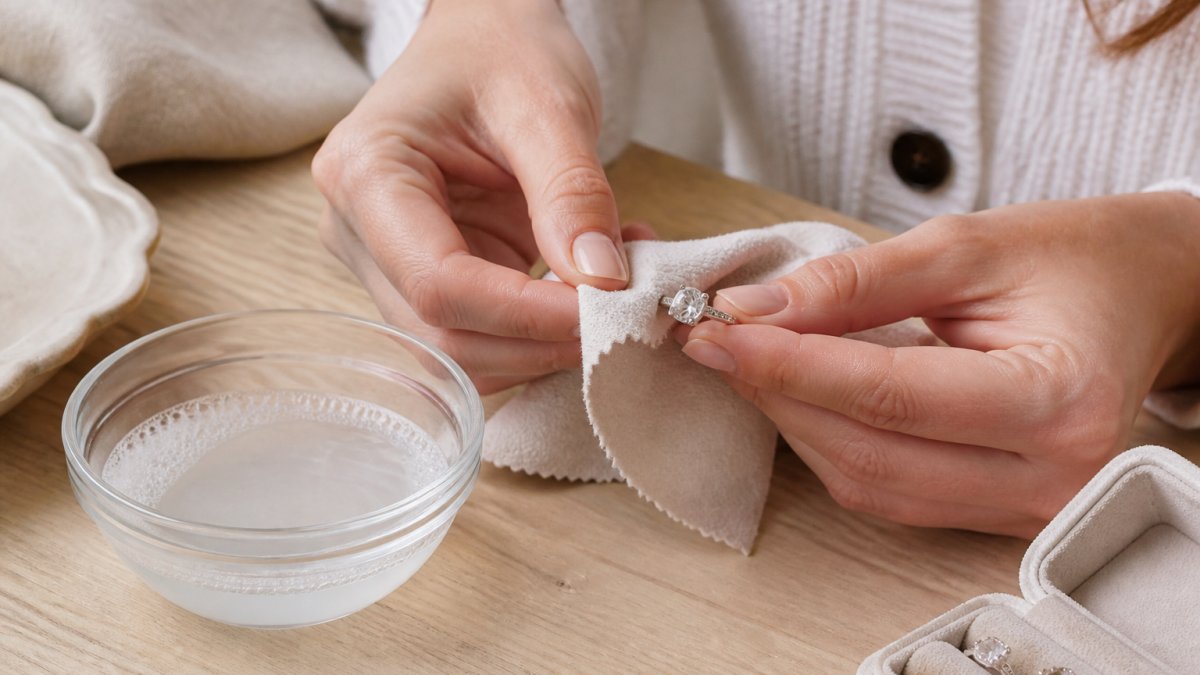
Gentle cleaning is the practice of removing dirt and tarnish from silver using mild soap, warm water, and soft materials, without abrasive polishes or harsh chemicals.
What You'll Need Before You Start
Gather these basics before you touch your jewelry:
- A small bowl of warm water
- A drop of mild soap, like dish soap without harsh additives
- A soft microfiber cloth
Skip anything labeled abrasive. Paper towels, rough sponges, and whitening toothpaste all scratch silver. Plain soap and water handle most everyday grime.
Step-by-Step: Soak, Rinse, and Dry
Follow these steps for routine cleaning:
- Soak the piece in warm soapy water for a few minutes.
- Brush gently with a soft toothbrush around settings and edges.
- Rinse under cool water to lift the soap.
- Dry fully with a soft cloth, then let it air dry before storing.
Watch out: leaving silver wet invites new tarnish. Dry every crevice, especially behind stones and inside clasps.
How to Remove Tarnish From Sterling Silver
Tarnish is a natural dark film that forms when silver meets air and moisture. It is not dirt, so soap alone will not lift it. To remove tarnish from sterling silver, you need a method matched to how dark the piece has gone and how it is built.
Matching the Method to the Tarnish
Use this quick guide to pick your approach:
| Tarnish Level | Best Method | Avoid |
|---|---|---|
| Light film | Soft cloth and mild soap | Harsh polishes |
| Medium haze | Silver polishing cloth | Abrasive scrubbing |
| Heavy darkening | Baking soda or foil method | Repeated use on stones |
| Antique or oxidized finish | Dry soft cloth only | Water and dips |
The real difference between methods comes down to severity and construction. A plain silver ring can handle more than a pearl-set pendant. If a piece has glued settings, keep water and heat away from it entirely.
Clean Sterling Silver With Baking Soda (and When Not To)
Baking soda is the most misunderstood tool in silver care. It can lift moderate tarnish from plain silver, but it is a mild abrasive and an alkaline salt, so it can also dull a high polish, strip an oxidized finish, and seep into settings. The key is knowing which version of the method suits which piece, and when to put the box back in the cupboard.
The Baking Soda Paste (Plain Silver Only)
Use this for unadorned silver, a plain band, a simple chain, a bangle with no stones or glued components.
- Mix about three parts baking soda to one part water until it forms a soft paste. It should hold together but not feel gritty.
- Dab, don't scrub, the paste onto tarnished areas with a soft cloth or your fingertip.
- Leave it for under a minute. Longer does not mean brighter; it means more abrasion.
- Rinse thoroughly under cool water and dry every crevice with a soft cloth.
The Aluminum Foil and Hot Water Method
This one works by a different mechanism. Aluminum is more reactive than silver, so in a hot baking-soda-and-salt bath, the tarnish's sulfur transfers from the silver to the foil. The silver gives up its dark film without being rubbed.
A common home version uses a foil-lined glass bowl, hot (not boiling) water, a spoonful of baking soda, and a spoonful of salt.
What this method does well:
- Reaches crevices inside chains, filigree, and textured surfaces a cloth cannot
- Removes tarnish without mechanical rubbing
- Works quickly on medium to heavy tarnish on plain silver
What it cannot do:
- It will not remove dirt, lotion residue, or grime, that still needs soap and water first
- It can dull an oxidized or antiqued finish, because the reaction pulls tarnish from everywhere, including the darkened recesses that give those pieces their character
- It is unsafe for pearls, opals, turquoise, and other porous stones, and for glued settings where heat and moisture can loosen adhesive
Choosing Between the Two
| Piece type | Baking soda paste | Foil + hot water |
|---|---|---|
| Plain silver band or chain | Yes, brief contact | Yes |
| High-polish mirror finish | No | Use with care |
| Oxidized or antiqued silver | No | No |
| Pearl, opal, or porous stone | No | No |
| Glued settings | No | No |
| Plated or vermeil-style finish | No | No |
A simple rule: the more complicated the piece, the gentler the method. When in doubt, a silver polishing cloth and a soft dry wipe are the safest first step, and you can escalate only if tarnish remains.
After Either Method
Rinse with cool water, pat dry with a soft cloth, and let the piece air dry fully before storing. Any moisture left behind invites fresh tarnish within days. If a piece still looks dull after tarnish removal, the issue is likely surface scratches rather than tarnish, and that calls for a jeweler, not another home remedy.
What Not to Use to Clean Silver Jewelry
Knowing what not to use to clean silver jewelry matters as much as knowing what works. Some popular household items cause permanent damage.
Avoid these:
- Whitening toothpaste: too abrasive, scratches the surface
- Bleach and chlorine: can pit and discolor silver
- Rough sponges and paper towels: leave fine scratches
Also keep silver away from rubber bands and wool storage, which speed up tarnish. When in doubt, test any method on a hidden spot first.
How to Store Sterling Silver Jewelry to Slow Tarnish
Tarnish is a chemical reaction, not a cleaning problem. Silver reacts with sulfur compounds in the air, and with moisture, cosmetics, and even some fabrics, to form that dark film. Storage is where you win or lose the battle, and most people store silver in a way that speeds tarnish up rather than slowing it down.
What Actually Causes Tarnish
Three things drive tarnish: sulfur in the air, humidity, and contact with certain materials. Rubber bands, wool, and some paper products contain sulfur or acids that attack silver directly. Bathrooms and kitchens combine humidity with airborne sulfur, which is why a silver dish left on a bathroom counter darkens faster than one kept in a dry drawer.
Storage Habits That Work
- Cut off air. Airtight bags, zip pouches, or lined jewelry boxes slow the reaction. Anti-tarnish strips inside the bag absorb sulfur and extend the window between cleanings.
- Keep pieces separate. Each item in its own pouch or compartment prevents scratches, and scratches create more surface area for tarnish to grab.
- Store dry. Let pieces air dry completely after cleaning or wearing before they go into a bag. A single drop of trapped moisture can start a tarnish spot.
Wear It, Then Wipe It
Gentle friction from wearing actually slows tarnish, so a small rotation of pieces you actually wear is better for them than long storage. The habit that matters most: wipe each piece with a soft cloth before it goes away. That removes skin oils, lotion, perfume, and hairspray, all of which trap moisture and accelerate tarnish.
A Note on Display and Everyday Pieces
If you like to keep a few pieces out on a tray or stand, choose ones you wear often and wipe them weekly. Open display looks lovely but exposes silver to air and light continuously, so those pieces will need cleaning more often. For pieces you wear less, airtight storage is the better trade.
When to Clean vs. When to Store Better
If a piece tarnishes within days of cleaning, the problem is storage, not cleaning. Fix the storage first, airtight, dry, sulfur-free, and you will clean far less often. If a piece tarnishes even in good storage, check whether it is plated rather than solid sterling; plated finishes can discolor differently and need gentler handling.
Shop Sterling Silver Pieces Worth Caring For
Good care starts with pieces you love enough to maintain. At Shop Found & Fab's S925 sterling silver collection is made for everyday wear. Once you know how to clean sterling silver jewelry, you can keep your favorites shining for years.
A few shopping tips from us:
- Choose classic shapes you will wear often
- Store pieces with their care routine in mind
- Build a small rotation so each piece rests
Ready to find your next treasure? Shop our sterling silver jewelry collection and discover pieces worth caring for.
Frequently Asked Questions
What is the safest way to remove tarnish from sterling silver jewelry?
Start with the gentlest option: a few drops of mild soap in warm water, a soft cloth, and a soft toothbrush for crevices. For heavier tarnish, a short baking soda paste or an aluminum foil and hot water bath can help. Always test on a hidden spot, keep gemstones, pearls, and glued settings away from soaking and heat, and rinse and dry completely afterward. Gentle, repeated cleaning beats one aggressive scrub.
Can you clean sterling silver jewelry with baking soda?
Yes, for plain sterling silver pieces. Mix baking soda with a little water to form a paste, rub it on gently with your fingers or a soft cloth, then rinse and dry. Skip this method on pieces with gemstones, pearls, or glued settings, and don't use it on intentionally oxidized or antique finishes, since it can strip the dark detailing. Keep the paste soft rather than gritty to avoid scratching.
What should you not use to clean sterling silver jewelry?
Avoid chlorine and bleach, abrasive scouring pads, harsh household cleaners, and anything labeled as a strong acid. Skip ultrasonic cleaners for pieces with pearls, opals, or glued stones. Toothpaste and rough powders can leave fine scratches on polished surfaces. Also keep silver away from rubber bands and moisture-trapping storage, which speed up tarnish rather than prevent it.
How should you store sterling silver jewelry to prevent tarnishing?
Store each piece dry and separate in a soft pouch or a lined jewelry box, ideally with a tarnish-inhibiting strip. Keep silver away from humidity, direct sunlight, and rubber, and fasten chains to avoid tangles. Wearing your pieces regularly actually helps slow tarnish, and a quick wipe with a soft cloth before storage removes oils and sweat that speed up the process.
Caring for silver is a small habit with a big payoff, and the right pieces make it a pleasure. At Shop Found & Fab, we curate S925 sterling silver jewelry and moissanite pieces with GRA documentation, so you can build a collection that lasts. Explore our ever-changing selection of little luxuries and find something uniquely yours. Get started with Shop Found & Fab and keep every piece sparkling.
